

Every mother not only rocks fashionable hairstyles for themselves; you would be over the moon to see your children and grandchildren wear the hairstyle you braided for them. That’s where this guide comes in.
The French braid is cute, attractive and fashionable. The only setback is that you don’t really know how to nail it.

For most mothers, the question of “how do I French braid my hair?” is common and you can’t find a definite guide that’s visual, straightforward and clear. Well, this is it. We’re here to your rescue.
We’ll show you a quick guide on ways to French braid your hair for that instant beautification. Remember, this hairstyle only works if you have long hair.
With the resources in this post, you can make your long dream come through with just a few trails. So let get started.
What are the steps to French braid your hair at home?
- Brush your hair
- Split your hair into two sections down the back of your head
- Clip one section of the hair away with a hair clip
- Take a small triangular section of the hair in front of your hair
- Split the small portion of the hair into three portions and pull it in the direction you want the braid to go
- Cross the top strand over the middle strand
- Add more hair to the top strand and bottom strand
- Repeat the same routine as you continue your French braid
While French braiding one own hair can be a little tricky, I will explain step-by-step how to French braid your hair from top to bottom. Even if you have never braided before, all you need to do is follow these steps to become a master in French braiding.
Let’s explain in depth each stage.
Brush your hair.

This is a critical first step when you want to French braid. The first thing you want to do is brush all your hair to get rid of tangles. That way, it is easier to French braid your hair.
Split your hair into two sections down the back of your head.

Start by dividing your hair into two down the back of your head.
This makes French braiding manageable, particularly when your hair is smooth and fluffy.
Clip one section of it away with a hair clip.

We’ll make it easy. Find a clip and hold one side of your mid-part back. You don’t want the sections to collapse and fall back to where they were.
It also lets your hands-free to do the braiding.
Take a small triangular section of the hair in front of your hair.

Divide and hold a small portion of hair that kind of looks like a triangle (but also doesn’t) in the front part of your hair.
This depends on your hair growth. Some people have fuller hair at the front of their head, others have a fairly scanty hair volume in this region.
However, this shouldn’t matter whether you can braid or not. You will just have to find another small section where you can use it. Don’t let it hold you back!
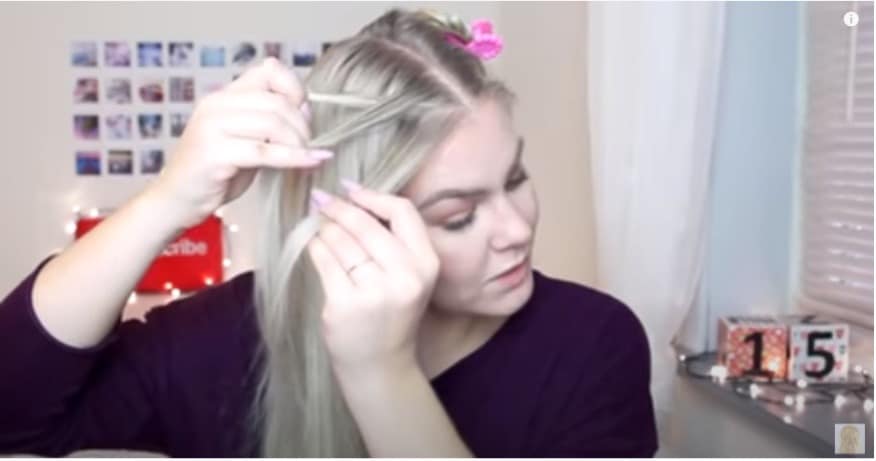
Split the small portion of the hair into three portions and pull it in the direction you want the braid to go.

Divide the small section in the previous step into three portions to form three strands, one top, one middle and one bottom one (like in the picture).
For most amateur braiders, you might choose to start from either the top strand or the bottom strand. In this tutorial, we’ll stick with the top strand.
However, do remember which strand you started with. You want to do the same to the other half of your hair. It would look weird otherwise.
Cross the top strand over the middle strand.
Pick the top strand of the pulled hair and cross it over and into the middle strand.
At this point, the middle strand is called the top strand (because it went to where the top strand was) and the top strand is now the middle strand.
The easiest way to think of it is – whichever position a strand is in your hand, it’s the position you should call it.
Then, Weave the bottom strand over to the top position
This makes the bottom strand “the top strand”. That’s essentially the movement you will follow for the rest of the braiding process.
Add more hair to the top strand and bottom strand.

There are two ways to add in hair while making a French braid. However, to keep it very beginner-friendly, we’ll go with the simplest option.
This is a little bit tricky. So “adding hair” means that you take a moderate portion of your hair at the top and add it to the top strand (which was previously the bottom strand).
You will then combine the top strand and the newly taken hair to weave it in the middle.
Then, do the same thing with the bottom strand. Take a bit of hair, combine and weave it so it becomes the top strand.
Repeat the same routine as you continue your french braid.
You just need to repeat the entire step 7 over and over again until you run out of hair near your scalp to add.
It’s normal to still have some long hair left.
You can now braid it as a normal braid and tie it up with a hair tie.
Voila! You did it!
Don’t forget to braid the other side of your hair the same way.
Should you French braid?
It is sad to say but French braid shouldn’t be overused.
The French braid is a tight hairstyle. It causes pulling on your scalp.
The scalp can get damaged from excessive and constant pulling from the hairstyle. It results in a type of hair loss called “Traction Alopecia”.
Conclusion
Although most beginners may fail at the first, I believe that by following this guide and the pictures, you would succeed at French braiding. If you are a visual learner, you can head over to this YouTube video to learn how to do it.
I hope the step-by-step guide has proved helpful in learning how to French braid your hair. If you liked this, be sure to revisit our site to get more awesome content!
Pictures used in this guide is courtesy of EverydayHairInspiration